8. Final RPi Setup Steps
23 Jan 2018Overview
The Micro SD card you purchased for the Raspberry Pi operates as your Pi's hard disk. Frequently programmers will distribute an image file, or a fully configured Operating System, for others to duplicate as necessary. Using someone else's image often involves a three-step process:
- downloading a
.zipfile from somewhere - unzipping that file (resulting in a
.imgfile) - writing the
.imgfile to a Micro SD card from your laptop
If you completed HMWRK #1 and #3 you should have already completed this process with the image I prepared for this class.
Personalizing Your Pi (pt. 1)
We need to perform a few extra steps in order to more easily distinguish one person's Pi from others on the WIFI network. I have brought an external PC monitor into the classroom, and given it a keyboard and mouse, to facilitate this.
Changing Your Hostname
A computer's Hostname is label a device is given on a WIFI network for easy reference. Right now all of the Pi's have the same Hostname: creativetech. Using a unique hostname will allow us to connect directly to our Pi without accidentally connecting to someone else's.
- Plug your Pi into the PC Monitor, Keyboard, and Mouse I brought into the classroom
- Plug the Pi's power adapter into the wall. After a moment you should see lots of text appear on the screen
- At the login prompt, enter the following credentials:
- username: pi
- password: adventures
Execute the following command:
sudo raspi-config. You should see something like this: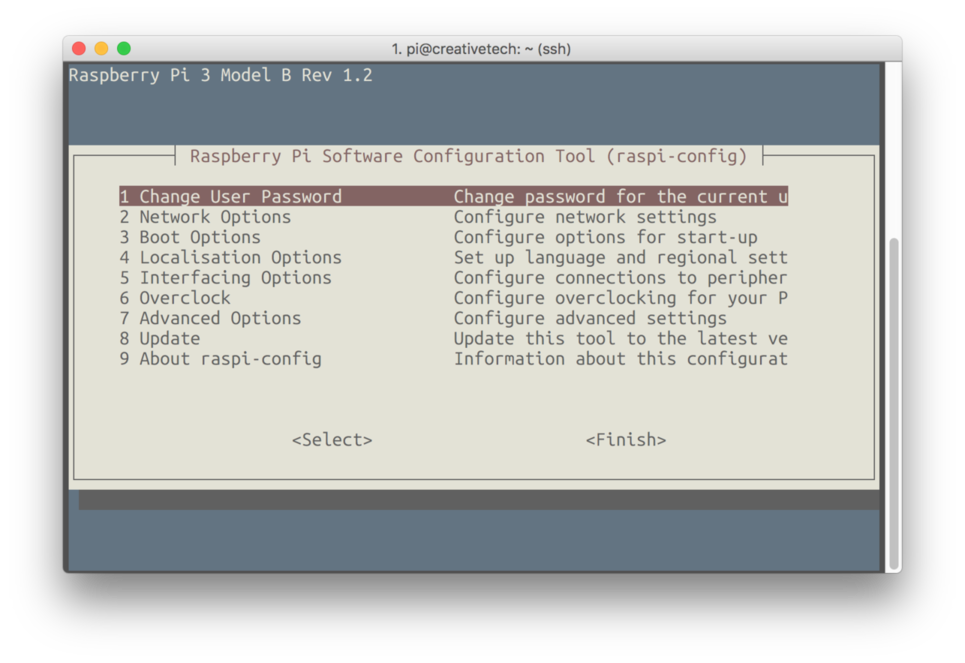
Using the arrow keys scroll to
Network Optionsand click[ENTER]Select
Hostnameand click[ENTER]Select
OKand click[ENTER]Change your hostname to something unique (note: you can only use letters and numbers in hostnames, no symbols), hit
[ENTER]Using the arrow keys click [RIGHT ARROW] twice to select
Finish, click[ENTER]to reboot your PiWhen the login prompt appears again you should see your newly entered hostname appear
Connecting to Your Pi (via SSH)
The most convenient way to go back and forth between your Laptop and the Pi is connecting your laptop to the Pi over WIFI. In order to do this, we need to use a tool called ssh, which stands for secure shell. In order to do this one needs to check a few things first:
- The Raspberry Pi and Laptop must be on the same Wifi Network
- The hostname or IP Address of the Raspberry Pi
- The username of the Raspberry Pi
- The password for the user in step 3
Here is what the command should look like (replace words in caps between brackets with information to suit your situation):
ssh [USERNAME]@[HOSTNAME].local
If your information is correct you should see a prompt to enter the user password in the terminal. Click [ENTER] once you have done so and you should be able to interact with your Pi from your laptop.
Personalizing Your Pi (pt. 2)
I generally recommend creating a new user on your Raspberry Pi in addition to the general pi user. This way you have a user you can load with all kinds of personal information in addition to a generic user you can revert back to in a worst-case-scenario.
Make a New user
Issue the following command in the terminal:
sudo useradd -m -G pi,sudo,gpio,audio,video [NEWNAME]using
-mwithuseraddchecks to see if there is already a home directory for user[NEWNAME]and creates one if there isn't one.-Gspecifies which groups the new user will be added to by default. If you want to be able to install things (sudo), access the general-purpose input/output (gpio), or use audio or video, you have to add your user to each of the relevant groups to do so.Next change the password of your new user by issuing the following command
sudo passwd [NEWNAME]When you are done restart your raspberry pi with the following command
sudo reboot nowand login to confirm that your new user exists.